How to remove 3d print from bed – Navigating the intricacies of 3D printing can be an exciting endeavor, but removing finished prints from the print bed can sometimes present challenges. In this comprehensive guide, we will delve into the various methods and techniques for effortlessly removing 3D prints from the print bed, ensuring a smooth and damage-free process.
From understanding the different tools and their applications to exploring advanced techniques and troubleshooting common issues, we will provide you with all the knowledge and tips you need to master the art of print removal. Whether you’re a seasoned pro or just starting your 3D printing journey, this guide will empower you to confidently remove your creations from the print bed with ease.
Methods for Removing 3D Prints from Bed

Removing 3D prints from the bed can be a delicate task, especially for prints with intricate details or those made from delicate materials. Several methods can be employed to safely remove prints without damaging them or the print bed.
Bend and Pop Method
This method involves gently bending the print bed to create a gap between the print and the bed. The print can then be easily popped off. This method is suitable for prints with a large surface area and a rigid base.
Using a Putty Knife or Spatula
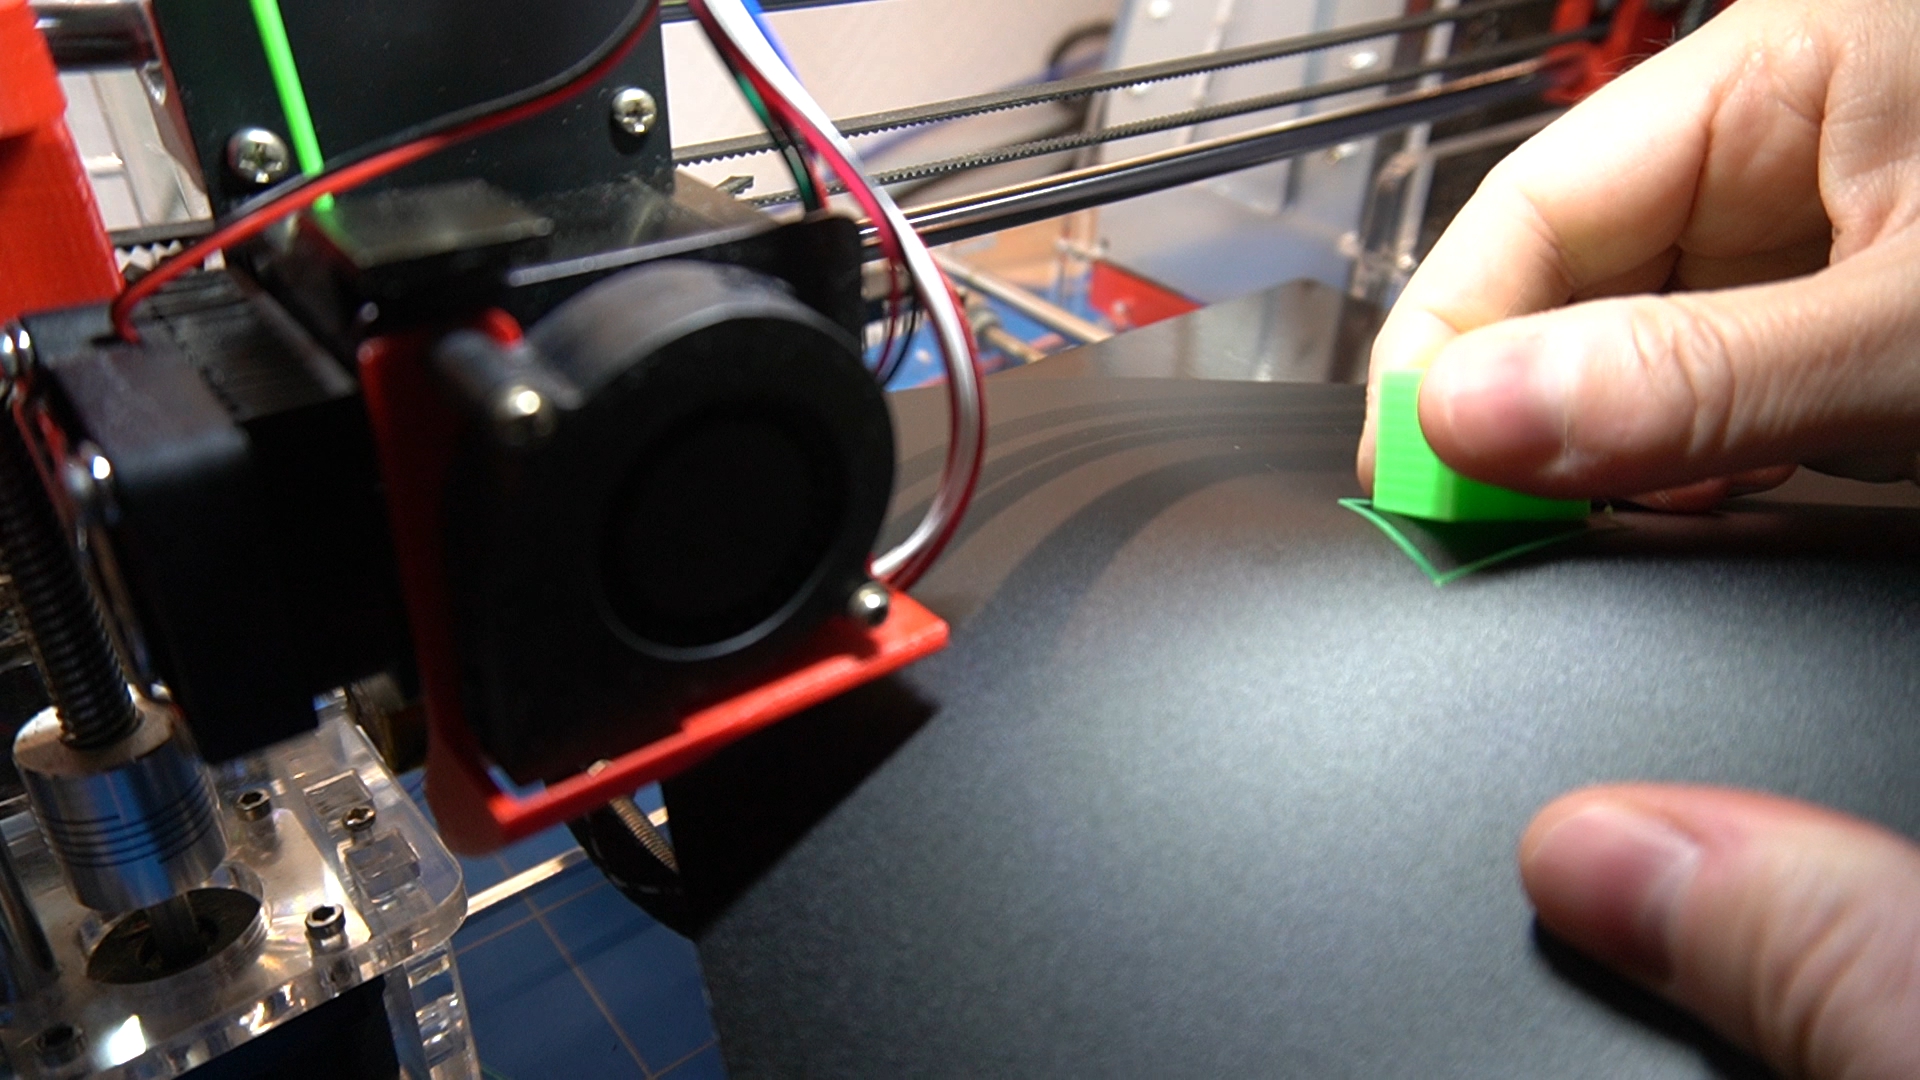
A putty knife or spatula can be used to carefully pry the print from the bed. The knife should be held at a shallow angle to the bed, and gentle pressure should be applied to avoid damaging the print or the bed surface.
This method is effective for prints with a flat base.
Using a Razor Blade or Scalpel
A razor blade or scalpel can be used to cut the filament between the print and the bed. This method should be used with caution, as the blades can be sharp and can easily damage the print or the bed.
It is suitable for prints with delicate details or those made from soft materials.
The delicate nature of 3D prints demands proper handling to prevent damage during removal from the bed. While there are various techniques for removing prints, ensuring their integrity is paramount. If your printer encounters issues, understanding how to clean the printer head can resolve print quality problems.
A helpful guide on how to clean Epson printer head provides step-by-step instructions for effective maintenance. Returning to the topic of 3D print removal, employing gentle methods like using a scraper or heating the bed can effectively detach the print without compromising its quality.
Dental Floss Trick
This method involves using dental floss to cut the filament between the print and the bed. The floss is inserted into the gap between the print and the bed and is then pulled back and forth to cut the filament.
This method is effective for removing delicate prints without damaging them.
Using a Heated Bed
A heated bed can help to release the print from the bed by softening the filament. This method is particularly effective for prints made from materials with a low melting point, such as PLA. The bed temperature should be set to just below the melting point of the filament.
| Method | Pros | Cons |
|---|---|---|
| Bend and Pop | Simple and effective | Not suitable for delicate prints or prints with a small surface area |
| Putty Knife or Spatula | Effective for prints with a flat base | Can damage the print or the bed if not used carefully |
| Razor Blade or Scalpel | Suitable for delicate prints or prints made from soft materials | Can be dangerous if not used carefully |
| Dental Floss Trick | Effective for removing delicate prints | Can be time-consuming |
| Using a Heated Bed | Effective for prints made from materials with a low melting point | Requires a heated bed |
Choosing the Right Tool for the Job
Selecting the appropriate tool for removing 3D prints from the bed is crucial to prevent damage to both the print and the bed surface. Different tools offer varying advantages and disadvantages, and the optimal choice depends on the print material and bed type.
Manual Removal
- Advantages:
- No specialized tools required
- Gentle on both the print and bed
- Disadvantages:
- Can be time-consuming for larger prints
- May require more force, potentially damaging the print
Spatula
- Advantages:
- Thin and flexible, allowing for easy insertion under the print
- Provides leverage for prying the print loose
- Disadvantages:
- Can scratch or damage the bed surface if not used carefully
- Not suitable for prints with delicate features or thin walls
Putty Knife
- Advantages:
- Similar to a spatula, but wider and more rigid
- Can handle larger prints more effectively
- Disadvantages:
- Even more likely to scratch or damage the bed surface
- May be too bulky for smaller prints
Print Removal Tool
- Advantages:
- Specially designed for removing 3D prints
- Often includes features like adjustable blades and ergonomic handles
- Disadvantages:
- Can be expensive
- May not be necessary for most users
Comparison Table
| Tool | Advantages | Disadvantages |
|---|---|---|
| Manual Removal | Gentle, no tools required | Time-consuming, requires force |
| Spatula | Thin, flexible, provides leverage | Can scratch bed, not suitable for delicate prints |
| Putty Knife | Wide, rigid, handles larger prints | More likely to scratch bed, bulky for smaller prints |
| Print Removal Tool | Specialized design, adjustable blades | Expensive, may not be necessary |
Preventing 3D Prints from Sticking to Bed

Preventing 3D prints from adhering excessively to the print bed is crucial for successful printing. Several techniques can be employed to minimize adhesion, ensuring clean removal and maintaining print quality.
Adhesives and Release Agents
Applying adhesives like hairspray or glue stick to the print bed creates a temporary bond that helps the first layer adhere during printing. However, these adhesives can be difficult to remove after printing. Release agents, such as polyvinyl alcohol (PVA) or specialized sprays, provide a more temporary and easily removable solution, reducing adhesion while allowing for clean print removal.
Print Settings Adjustments
Adjusting print settings can also minimize adhesion. Reducing the first layer height allows the nozzle to lay down a thinner layer, reducing the surface area in contact with the print bed. Increasing the print bed temperature softens the filament, making it less likely to stick to the bed.
Using a brim or raft, which is a wider base layer, provides additional surface area for adhesion, preventing warping or lifting of the print.
Print Bed Preparation
Proper print bed preparation is essential. Cleaning the print bed with isopropyl alcohol removes oils and contaminants that can affect adhesion. Using a primer specifically designed for 3D printing can further enhance adhesion. Bed leveling ensures a flat and even surface, preventing uneven adhesion and potential warping.
Print Bed Materials, How to remove 3d print from bed
The choice of print bed material also influences adhesion. Glass provides a smooth and non-porous surface, reducing adhesion. PEI (polyetherimide) is a high-temperature-resistant material that offers excellent adhesion without the need for adhesives. Build plates, typically made of aluminum or steel, provide a durable and flat surface for printing.
Troubleshooting Adhesion Problems
If prints are warping or lifting, it may indicate excessive adhesion. Increasing the print bed temperature, using a brim or raft, or adjusting the print settings can help resolve these issues.
Dealing with Difficult-to-Remove Prints
Removing prints that are stuck tightly to the bed can be a challenge, but there are a few techniques that can help.One method is to use heat. Heating the bed can help to loosen the bond between the print and the bed.
This can be done using a heat gun or a hair dryer. Be careful not to overheat the bed, as this can damage the print or the bed itself.Another method is to use cold. Cooling the bed can help to shrink the print, which can make it easier to remove.
This can be done using a can of compressed air or by placing the bed in a freezer.If these methods do not work, you can try using a solvent to dissolve or soften the adhesive between the print and the bed.
There are a number of different solvents that can be used, so it is important to choose one that is compatible with the material of the print and the bed.
Using a solvent to remove a print
When using a solvent to remove a print, it is important to test the solvent on a small area of the print first to make sure that it does not damage the print. Once you have tested the solvent, apply it to the area between the print and the bed and allow it to sit for a few minutes.
The solvent should help to loosen the bond between the print and the bed, making it easier to remove.
Post-Removal Care for 3D Prints

Once a 3D print is removed from the bed, it is important to take proper care of it to ensure its longevity and quality.
Cleaning the Print Bed
After removing a print from the bed, it is essential to clean the surface to remove any residual adhesive or filament. This can be done using a soft cloth or brush dampened with isopropyl alcohol. Cleaning the bed regularly helps prevent prints from sticking too strongly and ensures a smooth surface for future prints.
Removing Adhesive Residue
If there is adhesive residue on the print, it can be removed using a variety of methods. One option is to use a soft cloth or brush dampened with warm water and mild soap. Alternatively, a dedicated adhesive remover can be used, following the manufacturer’s instructions carefully.
Storing 3D Prints
Proper storage is crucial to prevent warping or damage to 3D prints. Prints should be stored in a cool, dry place away from direct sunlight. To prevent warping, prints can be placed on a flat surface or stored in a sealed container with silica gel packets to absorb moisture.
Troubleshooting Common Issues
While removing 3D prints from the bed, you may encounter various challenges. Understanding the causes of these issues and implementing appropriate solutions can significantly improve the removal process.
Below are common issues and their respective solutions:
Excessive Print Adhesion
Prints sticking excessively to the bed can be caused by an excessively high bed temperature. To resolve this, lower the bed temperature to an appropriate setting for the filament being used.
Print Breakage During Removal
Prints breaking when removing from the bed can be caused by an excessively low bed temperature. To address this, increase the bed temperature to an appropriate setting for the filament being used.
Bed Damage During Removal
To prevent bed damage during removal, avoid using excessive force. Instead, use a scraper or spatula to gently lift the print from the bed. Additionally, applying a release agent, such as hairspray or glue stick, to the bed before printing can help prevent prints from sticking too strongly.
| Issue | Cause | Solution |
|---|---|---|
| Prints stick excessively to the bed | Bed temperature too high | Lower bed temperature |
| Prints break when removing from the bed | Bed temperature too low | Increase bed temperature |
| Bed is damaged during removal | Using too much force | Use a scraper or apply a release agent |
Tips for Preventing Bed Damage:
- Use a scraper or spatula to gently remove prints.
- Apply a release agent, such as hairspray or glue stick, to the bed before printing.
- Allow prints to cool completely before removing them from the bed.
Advanced Techniques for Removing 3D Prints
As 3D printing technology advances, so do the techniques for removing prints from the build platform. Specialized tools and innovative design strategies can make the removal process easier, faster, and safer for both the print and the printer.
Heated Beds and Magnetic Build Plates
Heated beds and magnetic build plates are two popular tools that can greatly simplify print removal. Heated beds allow the print to cool slowly, reducing the risk of warping or cracking. Magnetic build plates, on the other hand, provide a strong magnetic hold that keeps the print in place during printing but allows for easy removal afterward.
Breakaway Supports
Designing prints with breakaway supports can also make removal easier. Breakaway supports are designed to break away from the print cleanly, leaving behind a smooth surface. This technique is particularly useful for prints with complex geometries or overhangs.
Removing Large or Complex Prints
Removing large or complex prints from the build platform can be a challenge. One effective technique is to use a spatula or scraper to gently pry the print loose. Another option is to use a combination of heat and force, such as heating the print with a heat gun or hair dryer while gently applying pressure to remove it.
Tips for Different Print Materials
Different 3D printing materials have unique properties that affect how they adhere to the print bed and how they should be removed. Here are some tips for removing prints made from different materials:
PLA
- PLA is a common material that is easy to remove from the print bed.
- It can be removed by gently bending the print bed or using a spatula to pry it off.
- If the print is still stuck, you can try heating the print bed to soften the PLA.
ABS
- ABS is a more difficult material to remove from the print bed because it adheres more strongly.
- To remove ABS prints, you can use a heated print bed or a solvent such as acetone.
- Be careful not to use too much acetone, as it can damage the print.
PETG
- PETG is a strong and flexible material that can be difficult to remove from the print bed.
- To remove PETG prints, you can use a heated print bed or a solvent such as isopropyl alcohol.
- Be careful not to use too much isopropyl alcohol, as it can damage the print.
Other Materials
- Other materials, such as TPU and nylon, may require specialized removal methods.
- It is important to consult the manufacturer’s instructions for the specific material you are using.
| Material | Recommended Removal Method |
|---|---|
| PLA | Gently bending the print bed or using a spatula |
| ABS | Heated print bed or acetone |
| PETG | Heated print bed or isopropyl alcohol |
| Other Materials | Consult the manufacturer’s instructions |
Bed Preparation Techniques
Proper bed preparation is crucial for successful 3D printing. A well-prepared bed ensures that the print adheres securely during the printing process and can be easily removed afterward. The key techniques involved in bed preparation include leveling the print bed, using a heated bed, and applying adhesives or release agents.
Leveling the Print Bed
Leveling the print bed is essential to ensure that the nozzle is at the correct distance from the bed. An uneven bed can cause the print to warp, peel, or fail to adhere properly. Manual leveling involves adjusting the bed screws until the nozzle is the same distance from the bed at all points.
Automatic bed leveling systems use sensors to measure the distance between the nozzle and the bed and automatically adjust the bed accordingly.
Heated Bed
Using a heated bed can significantly improve the adhesion of the print to the bed. Heat helps the filament to bond with the bed surface, reducing the risk of warping or peeling. The optimal bed temperature depends on the filament material being used, with higher temperatures generally required for materials like ABS and lower temperatures for materials like PLA.
Adhesives and Release Agents
Adhesives and release agents can be applied to the print bed to further enhance adhesion or prevent the print from sticking too strongly to the bed. Adhesives, such as glue sticks or hairspray, provide a sticky surface for the filament to adhere to.
Release agents, such as silicone spray or painter’s tape, create a barrier between the filament and the bed, making it easier to remove the print.
Safety Precautions
Ensuring your safety during the 3D print removal process is paramount. Here are some essential precautions to follow:
Protective Gear
Wearing appropriate protective gear is crucial to minimize the risk of injuries.
- Gloves:Protect your hands from cuts and potential chemical exposure.
- Eye protection:Prevent eye injuries from flying debris or sharp edges.
Tool Handling
Handle sharp tools with utmost care to avoid cuts or punctures.
- Never attempt to remove a stuck tool without proper training.
- Use the appropriate tools for the job, ensuring they are sharp and in good condition.
Work Environment
Create a safe work environment to minimize hazards.
- Ventilation:Work in a well-ventilated area to avoid exposure to harmful fumes.
- Burns:Be cautious of hot surfaces to prevent skin burns.
Sharp Tool Disposal
Dispose of sharp tools properly to prevent accidents.
- Dispose of used blades or other sharp objects in designated sharps containers.
- Never leave sharp tools unattended.
Additional Safety Tips
- Be aware of your surroundings and potential hazards.
- If unsure about any aspect of the removal process, seek professional assistance.
| Safety Precaution | Importance |
|---|---|
| Wear gloves | Protects hands from cuts and chemicals |
| Wear eye protection | Prevents eye injuries from flying debris |
| Use sharp tools carefully | Reduces the risk of cuts and punctures |
| Avoid burns | Prevents skin injuries from hot surfaces |
| Work in a well-ventilated area | Reduces exposure to harmful fumes |
| Dispose of sharp tools properly | Prevents accidents and injuries |
Alternative Removal Methods: How To Remove 3d Print From Bed

Beyond the conventional methods discussed earlier, several alternative techniques can be employed to remove 3D prints from the bed. These methods offer unique advantages and cater to specific situations.
Submerging in Water Baths or Ultrasonic Cleaners
Submerging prints in a water bath or ultrasonic cleaner can effectively loosen the adhesion between the print and the bed. The ideal water temperature range is between 40-60°C (104-140°F). The recommended duration for submerging prints varies depending on the material and size of the print, but typically ranges from 15 minutes to several hours.
Using Release Sheets or Tape
Applying a release sheet or tape to the bed surface can prevent adhesion between the print and the bed. Release sheets are typically made of materials such as Kapton tape, blue painter’s tape, or polyimide film. These materials create a non-stick surface, allowing prints to be easily removed once cooled.
Removing Prints from Non-Traditional Bed Surfaces
3D prints can also be successfully removed from non-traditional bed surfaces with specific techniques:
Glass
- Allow the print to cool completely.
- Use a sharp blade or scraper to gently pry the print from the edges.
- Apply isopropyl alcohol or acetone to the bed surface to dissolve any remaining adhesive.
Wood
- Let the print cool completely.
- Use a heat gun or hair dryer to gently warm the print and soften the adhesive.
- Carefully remove the print using a spatula or scraper.
Metal
- Allow the print to cool completely.
- Use a metal scraper or putty knife to gently pry the print from the bed.
- Apply a thin layer of oil or lubricant to the bed surface before printing to prevent adhesion.
Fabric
- Let the print cool completely.
- Use a damp cloth or sponge to gently wipe away any adhesive residue.
- Apply a fabric softener or hairspray to the bed surface before printing to reduce adhesion.
Tools and Accessories
Removing 3D prints from the print bed requires a set of essential tools to ensure a clean and damage-free separation. The choice of tools depends on the material used for printing, the size and complexity of the print, and the adhesion strength between the print and the bed.
Spatulas
Spatulas are the most commonly used tools for removing 3D prints. They come in various shapes and sizes, each designed for specific applications. Thin, flexible spatulas are suitable for delicate prints, while wider, more rigid spatulas provide more leverage for larger prints.
Razors
Razors, such as hobby knives or X-acto knives, are used for precise cutting and scraping. They are particularly useful for removing stubborn prints that have adhered strongly to the bed. However, care must be taken to avoid damaging the print or the bed surface.
Other Tools
In addition to spatulas and razors, other tools can be helpful for removing 3D prints, such as:
Tweezers
For removing small or delicate prints.
Pliers
For gripping and pulling prints that are difficult to remove by hand.
Hairdryer or heat gun
For loosening the adhesion between the print and the bed by applying heat.
Isopropyl alcohol
For cleaning the print bed and removing any residue from the print.When choosing tools, it is important to consider the material of the print bed. Metal spatulas and razors should not be used on glass beds, as they can scratch the surface.
For successful 3D printing, removing the print from the bed is crucial. To ensure a clean separation, it’s essential to allow the print to cool before attempting removal. However, for printing double-sided documents, how to print double sided pdf can be a useful guide to achieve professional-looking results.
Returning to the topic of 3D printing, it’s recommended to use a spatula or scraper to gently pry the print from the bed, minimizing the risk of damage.
For glass beds, plastic spatulas or nylon scrapers are recommended.Specific brands or models of tools may vary in quality and durability. It is advisable to read reviews and compare products before making a purchase.
Case Studies

Case studies provide valuable insights into the challenges and solutions involved in removing 3D prints from the bed. They showcase both successful and unsuccessful print removals, allowing us to learn from the experiences of others and improve our own techniques.
Successful Print Removal
One successful case study involved the removal of a large and complex 3D print from a glass bed. The print had a wide base and intricate details, making it challenging to remove without damaging it. The user employed a combination of techniques, including using a putty knife to gently pry the edges of the print from the bed and a heat gun to soften the adhesive.
By carefully following the proper steps and using the appropriate tools, the user was able to remove the print successfully without any damage.
Unsuccessful Print Removal
An unsuccessful case study involved the removal of a small and delicate 3D print from a metal bed. The print had thin walls and sharp edges, making it prone to breakage. The user attempted to remove the print using a spatula, but the force applied caused the print to snap.
This case study highlights the importance of choosing the right tool for the job and exercising caution when removing delicate prints.
Community Forum Discussions
Online forums are a valuable resource for 3D printing enthusiasts, offering a platform to share knowledge, troubleshoot problems, and discover new techniques. These forums are often frequented by experienced 3D printing professionals and hobbyists who are eager to assist fellow community members.
Some of the most common questions and solutions discussed in online forums include:
- Tips for removing 3D prints from the bed without damaging them.
- Techniques for preventing 3D prints from sticking to the bed in the first place.
- Solutions for dealing with difficult-to-remove prints.
- Recommendations for the best tools and accessories for removing 3D prints.
- Advice on how to troubleshoot common issues encountered during the print removal process.
In addition to these common topics, forum discussions also often delve into more advanced techniques for removing 3D prints, such as using specialized tools or modifying the print bed surface. Participants in these discussions are often willing to share their own experiences and insights, making them a valuable resource for anyone looking to improve their 3D printing skills.
To participate in these forum discussions, simply visit a relevant 3D printing forum and create an account. Once you have an account, you can browse the existing threads or start your own discussion. Be sure to provide as much detail as possible about your question or problem, and be respectful of other members of the community.
Future Innovations

The future of 3D printing bed removal holds exciting possibilities, with advancements in print bed technology, new materials and techniques, and innovative removal methods. These innovations promise to improve print quality, reduce downtime, and enhance the overall 3D printing experience.
New Print Bed Technology
Self-leveling beds automatically adjust the printing surface to ensure a level base, improving print quality and reducing warping. Temperature-controlled beds maintain optimal adhesion temperatures, minimizing print failures and enhancing surface finish. Automated bed cleaning systems use sensors to detect and remove debris, reducing downtime and improving print quality.
New Materials and Techniques
Graphene coatings applied to the bed enhance adhesion and reduce warping. Magnetic beds provide easy print removal and minimize damage to the bed.
Future of 3D Printing Bed Removal
Non-contact removal methods, such as magnets, air pressure, or other technologies, eliminate the need for physical contact with the bed, reducing damage and improving print quality. Integrated print-removal systems built into 3D printers automate the removal process, increasing productivity and reducing downtime.
FAQ Overview
Why is it important to use adhesives when printing on a 3D printer?
Adhesives help to improve the adhesion between the print bed and the printed object, reducing the risk of warping or detachment during the printing process.
What is the “Bend and Pop” method for removing 3D prints?
The “Bend and Pop” method involves gently bending the print bed to create a slight gap between the print and the bed, allowing for easy removal.
How can I prevent 3D prints from sticking excessively to the print bed?
To prevent excessive adhesion, try adjusting print settings such as reducing the first layer height, increasing the print bed temperature, or using a brim or raft.


