How to remove printer from mac – Removing printers from a Mac can be a simple task, but it’s essential to follow the proper steps to avoid any issues. This guide will provide you with all the information you need to know about removing printers from your Mac, including how to identify your printer, remove it using System Preferences or Printer Utility, and troubleshoot any problems that may arise.
Understanding Printer Removal Process
Removing a printer from a Mac is a straightforward process that can be accomplished in a few simple steps. There are two primary methods for removing a printer: using the System Preferences application or the command line.
Using System Preferences
- Open System Preferences from the Apple menu.
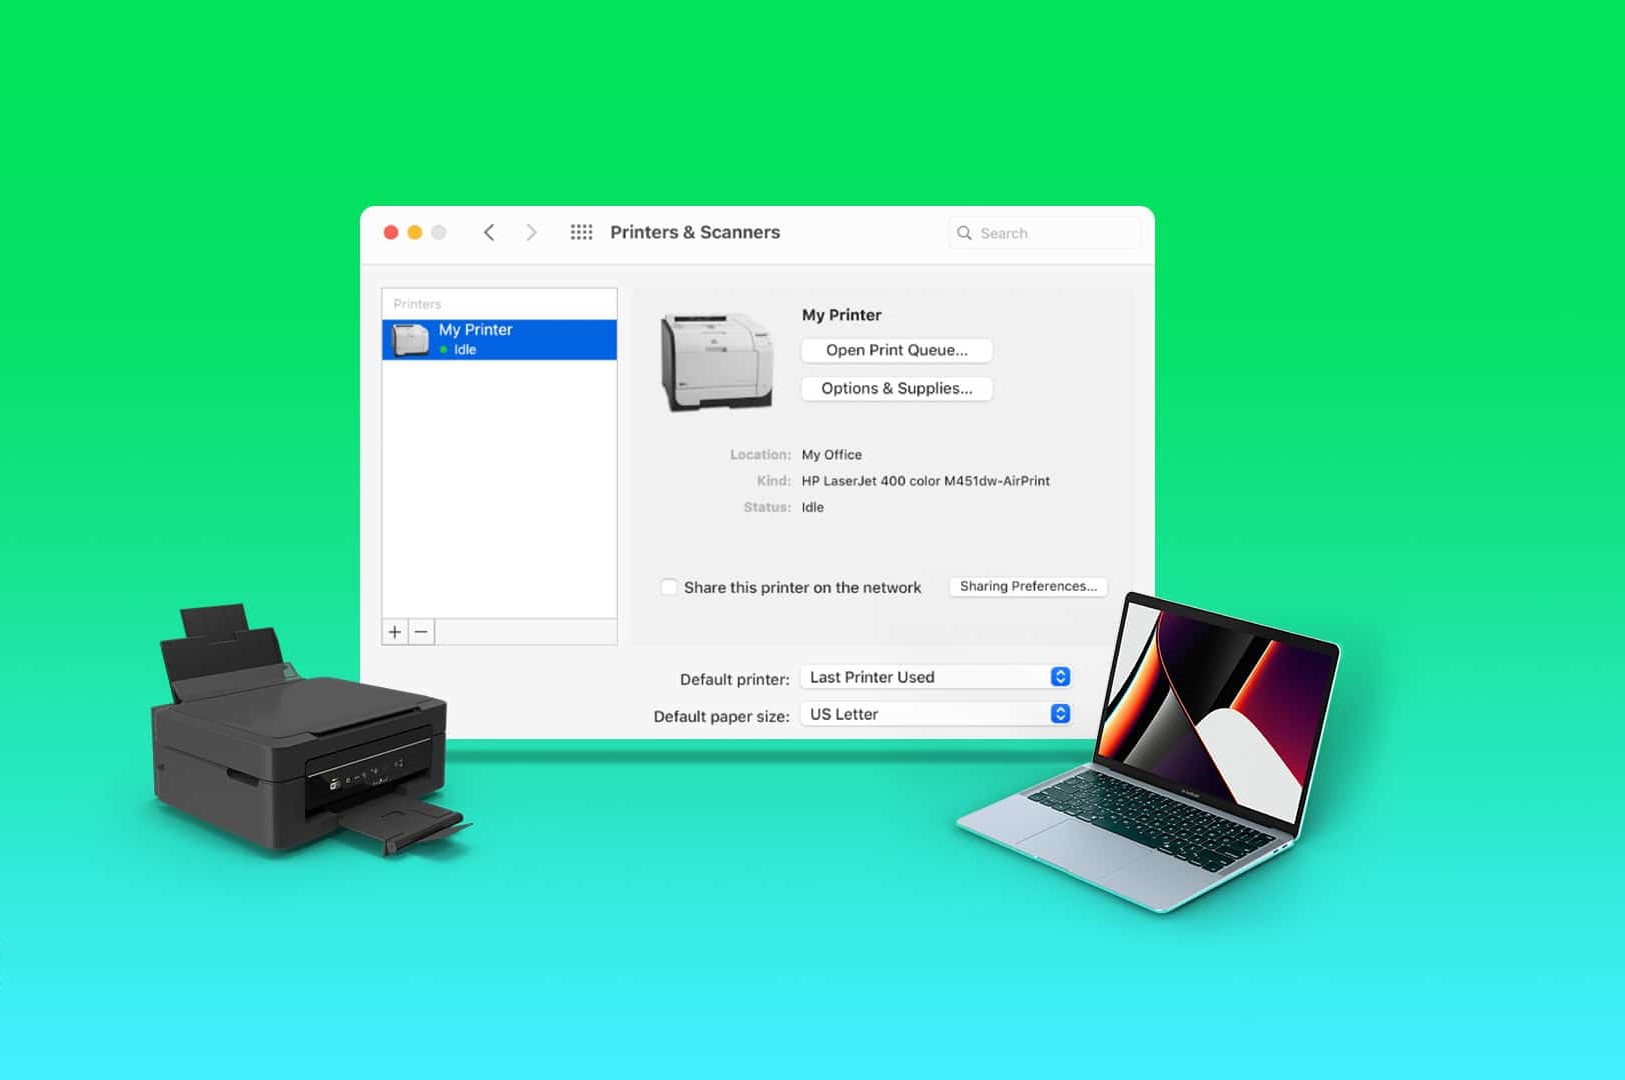
- Click on the “Printers & Scanners” icon.
- Select the printer you want to remove and click on the “-” button.
- Confirm the removal by clicking on the “Delete” button.
Using the Command Line
- Open Terminal from the Applications folder.
- Type the following command and press Enter:
- This command will list all the printers connected to your Mac.
- Type the following command and press Enter, replacing “printer_name” with the name of the printer you want to remove:
lpstat
p
lprm
P printer_name
Identifying Printer Name and Model

Knowing the name and model of your printer is crucial for effective printer management and troubleshooting. It helps you identify the correct drivers, locate support resources, and make informed decisions about printer settings and maintenance.
Locating Printer Name and Model on a Mac
There are two primary methods for locating the printer name and model on a Mac:
Method 1: Using System Preferences
- Click the Apple menu.
- Select “System Preferences.”
- Click “Printers & Scanners.”
- The printer name and model will be displayed in the left-hand pane.
Method 2: Using Printer Utility
- Open Printer Utility (located in the Applications/Utilities folder).
- Select the printer from the list on the left.
- The printer name and model will be displayed in the right-hand pane.
Refer to the table below for a summary of the steps for both methods.
| Method | Steps |
|---|---|
| System Preferences | Click the Apple menu > System Preferences > Printers & Scanners |
| Printer Utility | Open Printer Utility > Select printer from the list on the left |

Removing Printer via System Preferences

Removing a printer using System Preferences is a straightforward process that can be completed in a few simple steps. This method is suitable for both wireless and wired printers.
Selecting the Printer
To select the printer you want to remove, open System Preferences from the Apple menu. Click on “Printers & Scanners” and select the printer you want to delete from the list on the left-hand side.
Deleting the Printer
Once you have selected the printer, click on the “-” button at the bottom of the window. A confirmation dialog box will appear, asking you to confirm that you want to remove the printer. Click on “Remove” to proceed.
Confirming Removal, How to remove printer from mac
The printer will now be removed from your Mac. You can confirm this by checking the list of printers in System Preferences. The printer should no longer be listed.
Troubleshooting
If you encounter any issues while removing a printer, here are a few troubleshooting tips:
- Make sure that the printer is turned on and connected to your Mac.
- If you are removing a wireless printer, ensure that it is connected to the same Wi-Fi network as your Mac.
- Try restarting your Mac and the printer.
- If the printer is still not removed, you can try resetting the printing system. To do this, open Terminal and enter the following command:
sudo cupsctl--reset-printing-system
You will be prompted to enter your administrator password. Once you have entered your password, the printing system will be reset and the printer should be removed.
Reinstalling the Printer
If you need to reinstall the printer, you can do so by following these steps:
- Open System Preferences and click on “Printers & Scanners”.
- Click on the “+” button at the bottom of the window.
- Select the printer you want to add from the list of available printers.
- Click on the “Add” button to add the printer.
The printer will now be reinstalled and you will be able to use it again.
Removing Printer via Printer Utility
The Printer Utility is a convenient tool that allows you to manage and configure printers connected to your Mac. Using this utility, you can add, remove, and troubleshoot printers.
To remove a printer using Printer Utility, follow these steps:
Accessing Printer Utility
1. Click on the Apple menu and select “System Preferences”.
2. In the “System Preferences” window, click on “Printers & Scanners”.
3. The “Printers & Scanners” window will list all the printers that are connected to your Mac. Select the printer that you want to remove.
Removing the Printer
1. Click on the “-” button located at the bottom of the “Printers & Scanners” window.
2. A confirmation dialog box will appear. Click on the “Delete” button to confirm the removal.
The printer will now be removed from your Mac. You can verify this by checking the “Printers & Scanners” window, which should no longer list the removed printer.
Troubleshooting
If you encounter any issues while removing a printer using Printer Utility, here are some troubleshooting tips:
- Make sure that the printer is turned on and connected to your Mac.
- If the printer is connected via USB, try disconnecting and reconnecting the cable.
- Restart your Mac and try removing the printer again.
- If the issue persists, you can try resetting the printing system on your Mac. To do this, open Terminal and type the following command:
sudo cupsctl
--reset-printers
Press Enter and enter your administrator password when prompted. This will reset the printing system and remove all printers from your Mac. You can then add the printers back that you want to use.
Using Terminal s

Terminal s provide an alternative method for removing printers from a Mac. They offer a more technical approach and require a basic understanding of s.
To remove a printer using Terminal s, follow these steps:
Identifying the Printer’s Device Name
To identify the device name of the printer, use the following :
`lpstat
p`
This will list all connected printers along with their device names.
Removing a Printer Using `lpadminx`
x`
To remove a printer using `lpadmin -x`, use the following syntax:
`lpadmin
x
`
Replace `
Removing Print Jobs Associated with a Printer Using `lprmP`
P`
To remove print jobs associated with a specific printer, use the following syntax:
`lprm-P
`
Replace `
Troubleshooting Common Issues: How To Remove Printer From Mac

Printer removal on Mac can sometimes encounter issues. This section identifies common problems and provides troubleshooting solutions.
Common Error Messages
The following table lists common error messages encountered during printer removal and suggests troubleshooting steps:
| Error Message | Cause | Troubleshooting Steps |
|---|---|---|
| “The printer could not be removed because it is in use.” | Another application or process is using the printer. | Close all applications and processes that may be using the printer. |
| “The printer could not be removed because it is the default printer.” | The printer is set as the default printer. | Change the default printer to another printer before removing the printer. |
| “The printer could not be removed because it is locked.” | The printer is locked by a password. | Enter the password to unlock the printer. |
Troubleshooting Flowchart
The following flowchart provides a step-by-step guide to troubleshooting printer removal issues:
[Flowchart image or description here]
Additional Troubleshooting Tips
- Restart your Mac.
- Reset the printing system.
- Contact the printer manufacturer for support.
Deleting Printer Drivers

After removing a printer from your Mac, it’s recommended to delete its associated printer drivers to free up storage space and ensure a clean system.
To delete printer drivers, follow these steps:
Using the Library Folder
1. Open the Finder and navigate to the following directory:
“`/Library/Printers/“`
2. Locate the folder for the printer you removed. The folder name will typically include the printer model or manufacturer.
3. Drag the printer folder to the Trash.
Resetting Printing System

The printing system on a Mac is responsible for managing the communication between your Mac and your printer. If you are experiencing printing-related issues, such as your printer not printing or not being recognized by your Mac, resetting the printing system can often resolve the issue.
To reset the printing system on a Mac, follow these steps:
- Open the Apple menu and select “System Preferences.”
- Click on the “Printers & Scanners” icon.
- Control-click (or right-click) on the printer that you want to reset and select “Reset Printing System.”
- Click on the “Reset” button to confirm.
Once you have reset the printing system, your Mac will forget all of the printers that it was previously connected to. You will need to add your printers back to your Mac by following the steps in the “Adding a Printer” section of this guide.
Benefits of Resetting Printing System
Resetting the printing system on a Mac can resolve a variety of printing-related issues, including:
- Your printer is not printing.
- Your printer is not recognized by your Mac.
- You are experiencing paper jams or other printing errors.
- You have changed your printer or your Mac’s operating system.
Resetting the printing system can also help to improve the overall performance of your printing system.
Reinstalling Printer Drivers

Reinstalling printer drivers is essential to re-establish communication between your Mac and the printer after removing it. Outdated drivers can cause compatibility issues and hinder the printer’s functionality.
It’s crucial to obtain the latest drivers from the manufacturer’s website. These updates include bug fixes, performance enhancements, and compatibility improvements.
Removing a printer from a Mac is a straightforward process that involves navigating to the System Preferences menu, selecting Printers & Scanners, and clicking the minus (-) button next to the desired printer. Alternatively, for a unique printing experience, explore how to print on glass.
This unconventional technique allows you to create custom designs or transfer images onto glass surfaces, opening up new possibilities for creative expression. After exploring this intriguing method, you can easily return to the System Preferences menu and remove the printer if necessary.
Locating and Downloading Drivers
- Identify your printer’s make and model.
- Visit the manufacturer’s official website and navigate to the support or download section.
- Select your printer model and operating system (macOS).
- Download the latest driver package.
Using Third-Party Software
Third-party software can provide additional features and capabilities for printer removal and management beyond the built-in tools on macOS. These tools offer a range of options, including advanced printer management, driver updates, and troubleshooting tools.
Recommended Software
Several third-party software options are available for printer management on macOS. Some of the most popular and well-regarded include:
- Printopia: Printopia allows you to share printers over a network and access them from any Mac or iOS device. It also provides features like printer status monitoring and remote printing.
- Printer Pro: Printer Pro is a comprehensive printer management tool that offers a wide range of features, including printer discovery, driver management, and troubleshooting tools.
- VueScan: VueScan is a scanning software that also includes printer management features. It allows you to scan documents and images directly to your Mac and manage your printers.
The best software for your needs will depend on your specific requirements. If you need basic printer management capabilities, a free or low-cost option like Printopia may be sufficient. For more advanced features, a paid option like Printer Pro or VueScan may be a better choice.
How to Use Third-Party Software to Remove Printers
Using third-party software to remove printers is typically straightforward. Here are the general steps:
- Download and install the software.
- Open the software and navigate to the printer management section.
- Select the printer you want to remove.
- Click the “Remove” or “Delete” button.
- Confirm the removal.
Some third-party software may offer additional features for printer removal, such as the ability to remove all printers at once or to remove printer drivers. Refer to the software documentation for specific instructions.
Best Practices for Printer Removal
Following best practices for printer removal is essential to ensure a smooth and efficient process. Improper removal can lead to various issues, such as printing errors, system conflicts, and data loss. Therefore, it is crucial to adhere to the proper procedures Artikeld in this guide.
Planning and Preparation
- Before removing a printer, it is important to plan and prepare accordingly.
- Gather all necessary information, such as the printer name, model, and connection type.
- Back up any important printing-related data, such as print queues and printer settings.
Proper Removal Procedures
- Always follow the recommended removal procedures provided by the printer manufacturer or operating system.
- Use the appropriate tools and utilities for printer removal, such as System Preferences or Printer Utility.
- Avoid abruptly disconnecting the printer from the computer or power source.
Troubleshooting Common Issues
- If you encounter any issues during printer removal, refer to the troubleshooting section of this guide.
- Common issues include printer not being detected, print jobs stuck in the queue, or system errors.
- Follow the recommended troubleshooting steps to resolve these issues.
Maintaining System Health
- After removing a printer, it is important to maintain system health by cleaning up any residual files or settings.
- Delete any unnecessary printer drivers or software components.
- Reset the printing system to its default settings if necessary.
Reinstallation and Third-Party Software
- If you need to reinstall the printer at a later time, follow the manufacturer’s instructions carefully.
- Use the latest printer drivers and software to ensure compatibility and optimal performance.
- Consider using third-party software for advanced printer management and troubleshooting.
Security Considerations

Removing a printer from a Mac involves disconnecting the printer from the computer and deleting its associated software and drivers. While this process is generally straightforward, there are some security considerations to keep in mind.
One potential risk is that unauthorized users could gain access to sensitive information stored on the printer, such as print jobs or scanned documents. To mitigate this risk, it is important to ensure that the printer is properly disconnected from the network and that all sensitive data is removed from the printer’s memory.
Removing a printer from a Mac is a simple process that can be completed in a few steps. To begin, open System Preferences and click on Printers & Scanners. Select the printer you want to remove and click on the minus (-) button.
If you’re having trouble removing a printer, you can check out our guide on would dying a shirt effect screen printing. Once you’ve removed the printer, you can add it back later if you need to.
Best Practices for Secure Printer Removal
- Disconnect the printer from the network and computer.
- Delete all print jobs and scanned documents from the printer’s memory.
- Remove the printer’s software and drivers from the Mac.
- Reset the printer’s network settings to factory defaults.
Additional Tips and Resources
Beyond the steps Artikeld above, here are some additional tips and resources to assist with printer removal and management on your Mac:
Troubleshooting Common Printer Issues
- If you encounter difficulties removing a printer, consult Apple’s support website for troubleshooting tips.
- Check for any pending software updates that may address printer-related issues.
- Restart your Mac to resolve potential temporary glitches.
- Inspect the physical connection between the printer and your Mac to ensure it’s secure.
- Consider resetting the printing system as a last resort to resolve persistent issues.
Useful Links and Resources
- Apple Support: Remove a printer on Mac
- Macworld: How to remove a printer from a Mac
- Tom’s Guide: How to remove a printer from a Mac
Conclusion
Removing a printer from a Mac requires careful attention to ensure the process is completed thoroughly and without complications. By following the steps Artikeld in this article, users can effectively remove printers from their systems and avoid potential issues.
It is essential to remember that proper printer removal procedures are crucial to maintain a well-functioning printing system. Neglecting to remove printers correctly can lead to errors, conflicts, and performance problems.
Common Mistakes to Avoid
- Incomplete Removal:Failing to remove all printer-related files, drivers, and preferences can cause conflicts and errors.
- Incorrect Method:Using the wrong method to remove a printer can leave behind residual files and settings.
- Ignoring Troubleshooting:Overlooking potential issues during the removal process can lead to persistent problems.
Safe Printer Disposal
When disposing of a used printer, it is important to consider environmental regulations and safety guidelines. Contact local authorities or recycling centers for proper disposal methods to avoid environmental harm.
Steps for Removing a Printer from a Mac
| Step | Action |
|---|---|
| 1 | Identify the printer name and model. |
| 2 | Remove the printer via System Preferences or Printer Utility. |
| 3 | Use Terminal to delete printer drivers (if necessary). |
| 4 | Reset the printing system (if troubleshooting is required). |
| 5 | Reinstall printer drivers (if the printer is to be reconnected). |
FAQ Explained
How do I identify my printer on my Mac?
You can identify your printer by going to System Preferences > Printers & Scanners. The name and model of your printer will be displayed in the left-hand pane.
How do I remove a printer using System Preferences?
To remove a printer using System Preferences, go to System Preferences > Printers & Scanners. Select the printer you want to remove and click the “-” button. Confirm the removal by clicking the “Remove” button.
How do I remove a printer using Printer Utility?
To remove a printer using Printer Utility, open Printer Utility. Select the printer you want to remove and click the “-” button. Confirm the removal by clicking the “Remove” button.


